The Sales Module is one of the software tools that provides an advanced and complete solution designed to simplify the entire sales process for businesses of all sizes. It has powerful automation features. It helps from the moment a customer shows interest until the company receives payment. We can also connect with other modules such as Inventory, Accounting, and CRM, enabling businesses to maintain a cohesive flow of information across different departments.
Businesses use the sales module to make their sales process faster and more organized. Without a system,sales data can be lost or mismanaged. With odoo Sales, users can manage quotations, track customer interactions, set pricing strategies, and apply discounts with ease. The module also includes enhanced reporting and analytics capabilities, allowing businesses to gain valuable insights into sales performance and trends. With features like multi-currency and multi-company support, Odoo 18 Sales is suitable for both small businesses and large organizations.
Now we will explore how this module works from the perspective of a real user.
Now let us see how to perform this process step by step in Odoo 19, starting from creating a quotation.
CREATING A NEW QUOTATION
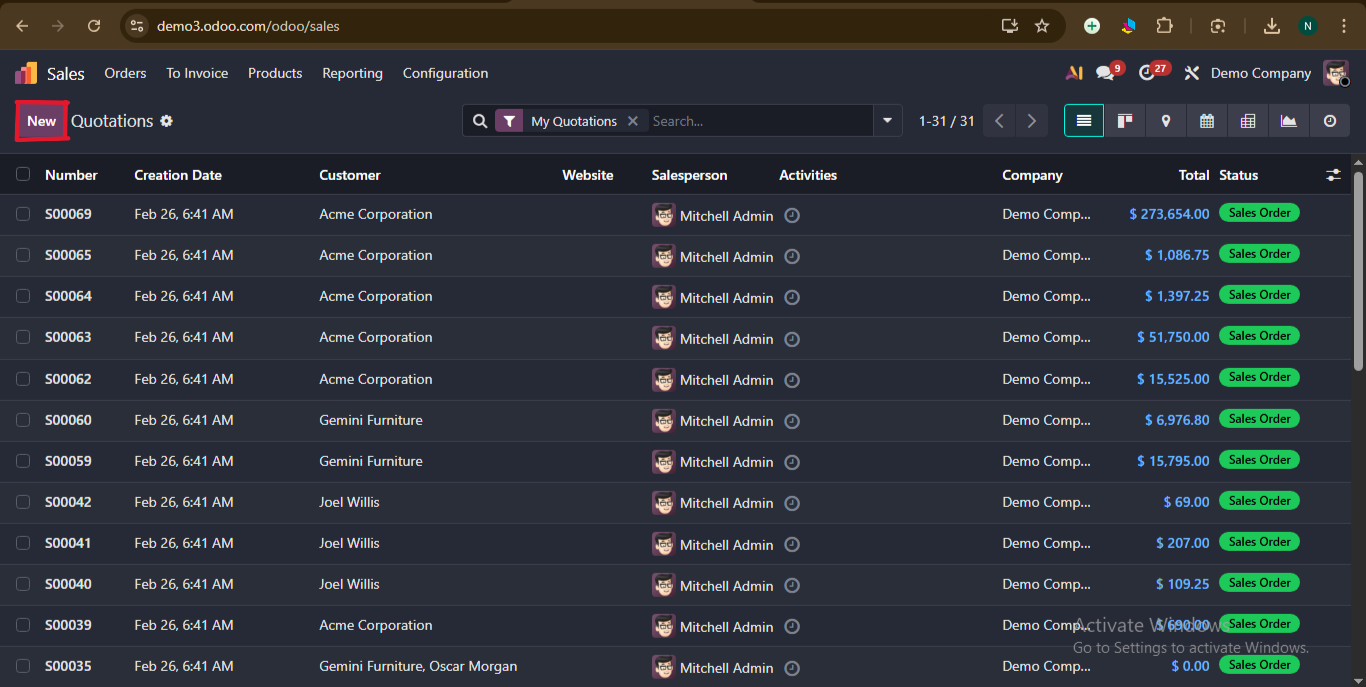
To create a quotation, go to the Sales module. From the top menu, click on Orders, and then select Quotations. Here, you will see the list of existing quotations. Click on the New button to start a new quotation.
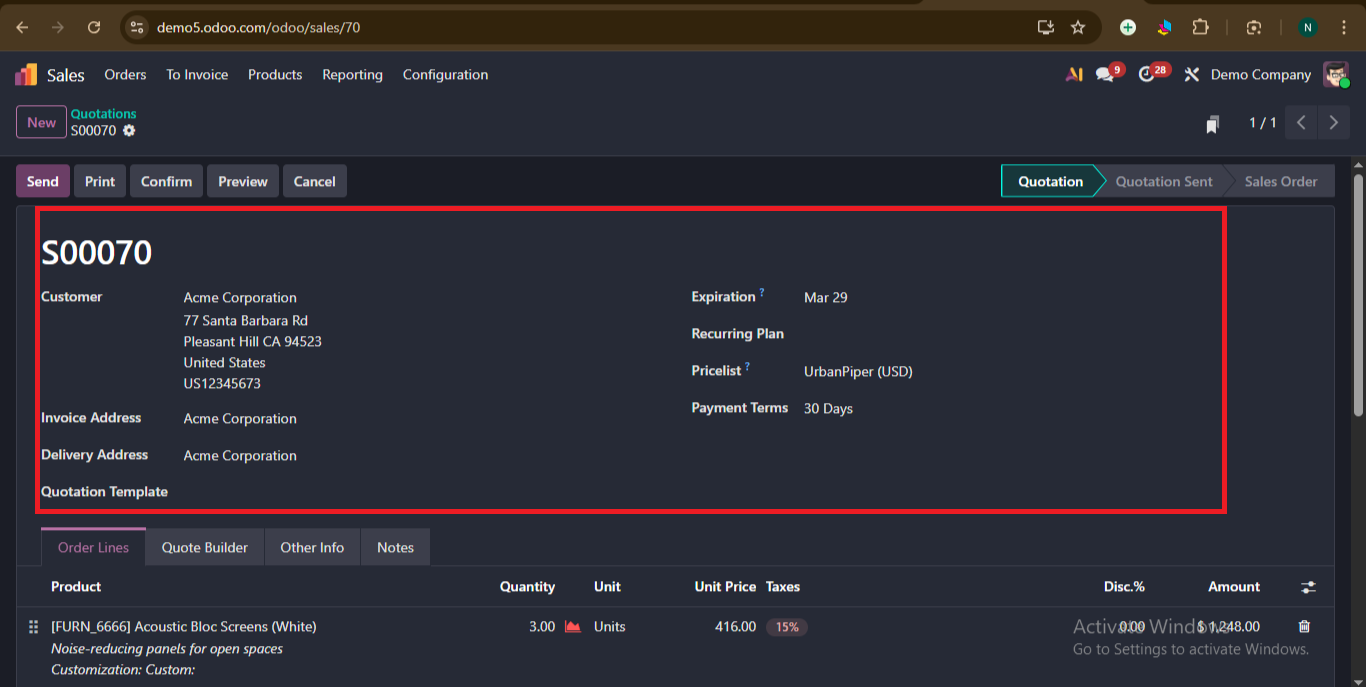
Select Customer (This field is mandatory).Once the customer is selected, the Invoice Address and Delivery Address will automatically fill in with the recorded information for those fields if the customer's information is already in the database.
Fill other details as per business requirements, such as quotation template, expiration, recurring plan, pricelist, and payment terms
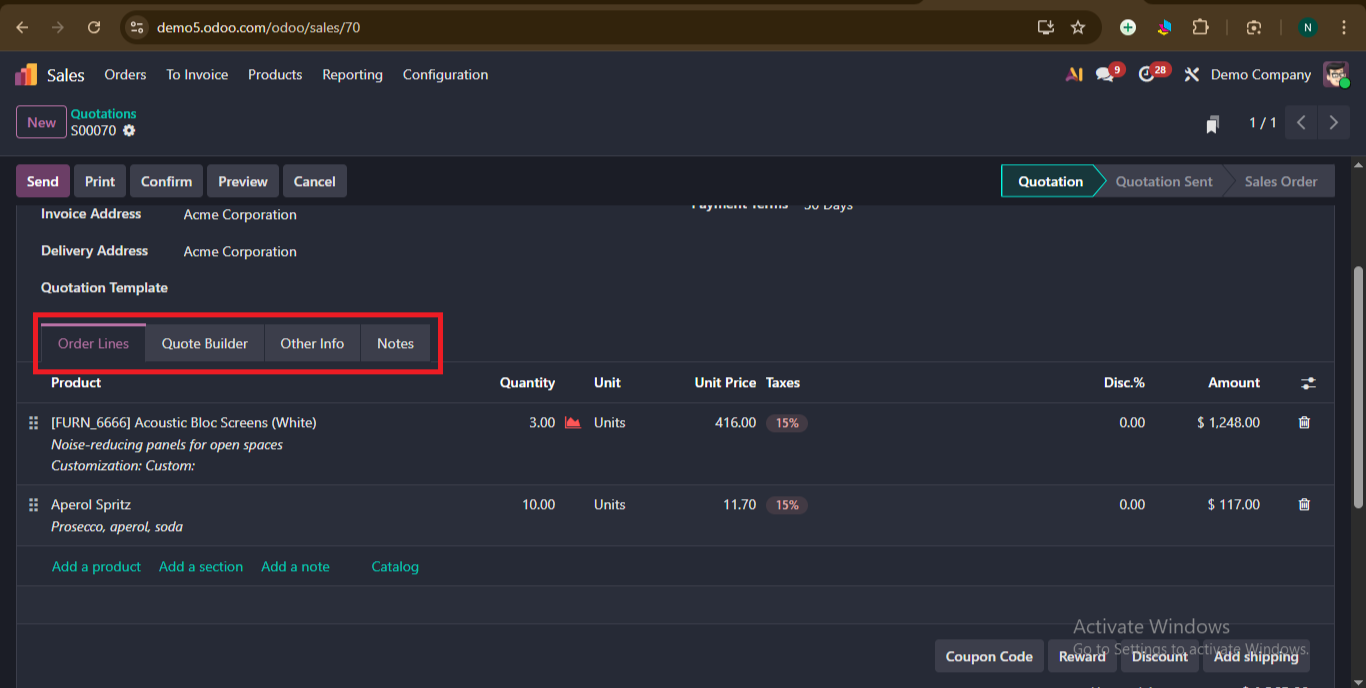
In the Order Lines section:
To add a product you can do it in two ways either by clicking on ‘Add a product’ or ‘Catalog’.
If you want to present several items on the quotation in a more structured manner, click on ‘Add a Section’ and then drag and drop the section heading among the items
To add a personalized note about a particular product, click ‘Add a note’, if necessary.
In the Quote Builder:
The Quote Builder allows you to customize the layout and appearance of the quotation PDF. You can add header pages, detailed product descriptions, images, and footer content.
If it is not visible you have to enable it from configuration>settings under ‘Quotations & Orders’ enable ‘PDF Quote builder’
In the Other Info tab:
You can see configurable sales, invoicing, delivery and tracking specific fields.
In the Notes:
Here, you can include any particular internal notes on the quotation and/or customer.
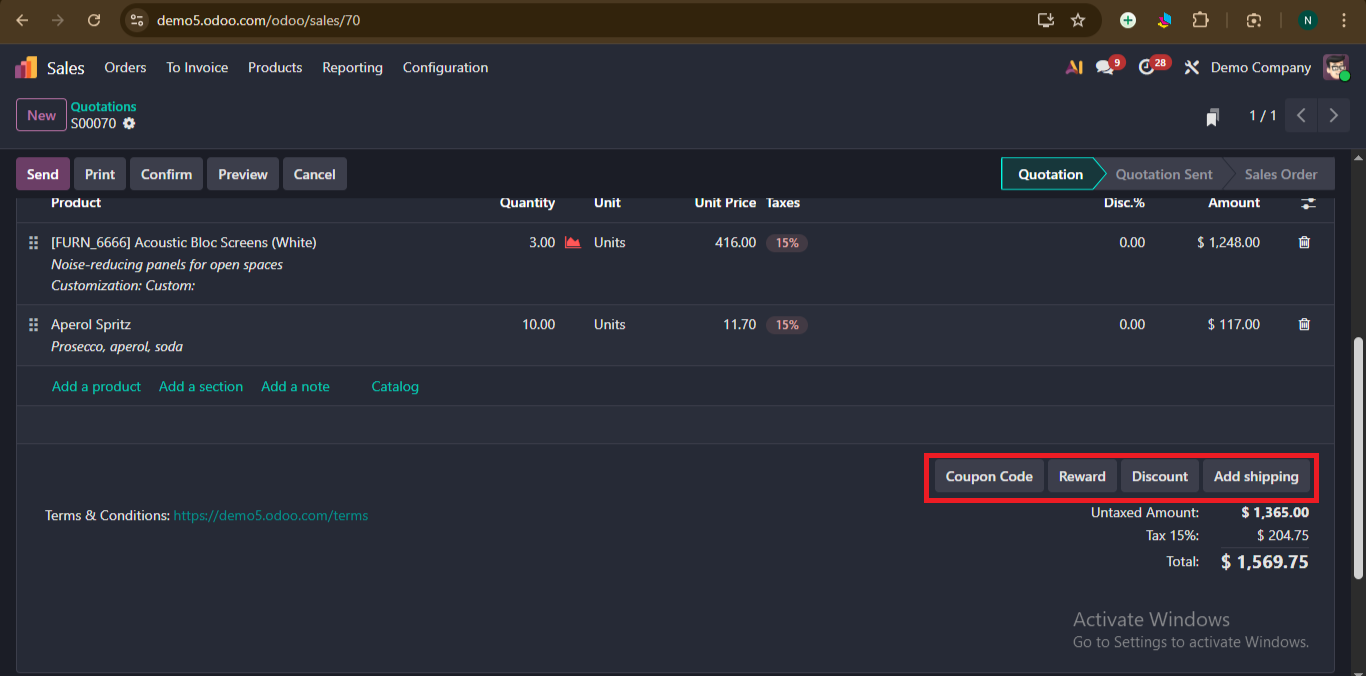
To apply Discounts and promotions, you can click on the discount, reward or coupon code tab as per your requirements
Here, the coupon code and rewards can be enabled from configuration > settings under pricing subheading enable ‘Promotion, Loyalty and Gift card’ and click on save.
To enable ‘Add shipping’, configuration > settings under shipping subheading enable ‘Delivery Methods.’
After all required fields and tabs are set up, Now its time to send the quotation to the client for approval
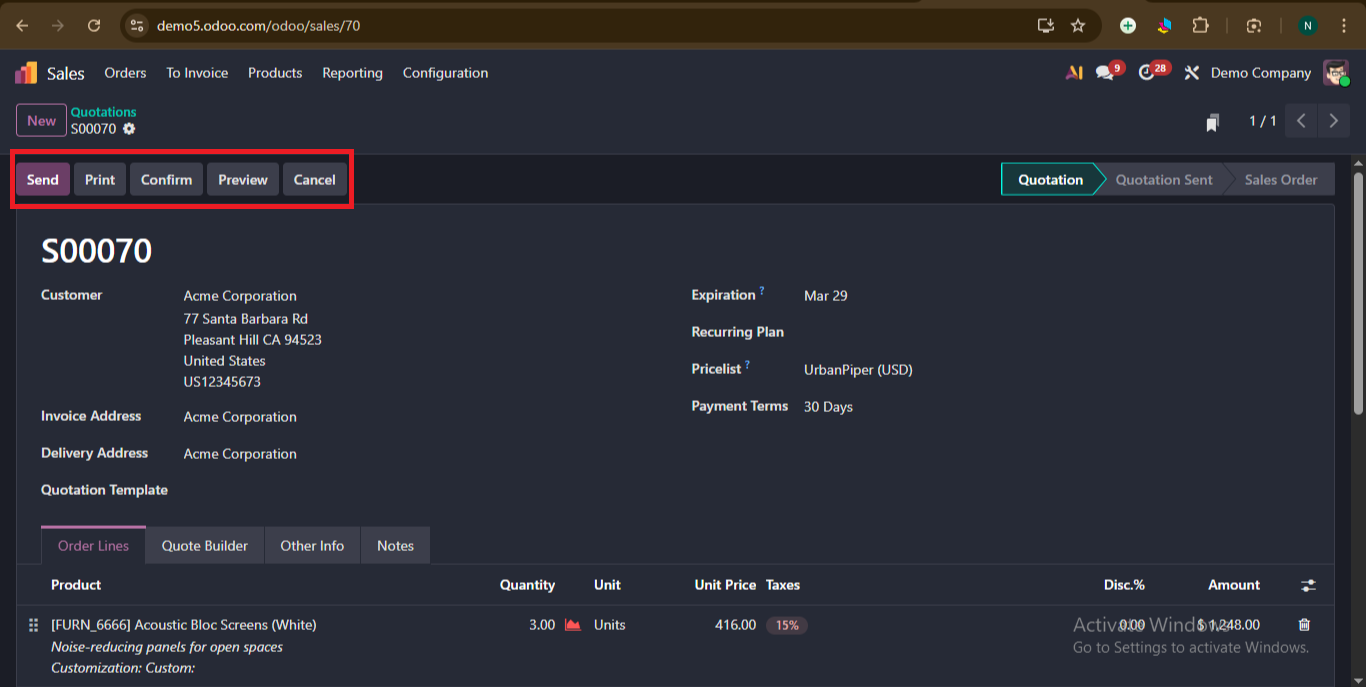
Look at the number of buttons at the top: Send, Print, Confirm, Preview,Cancel.
Here, ‘Print’ allows you to have a printout of the quotation, and ‘Preview’ allows you to see how this quotation looks to the customer when we click ‘Send’.
Now let’s look at what happens when we click ‘Send’.
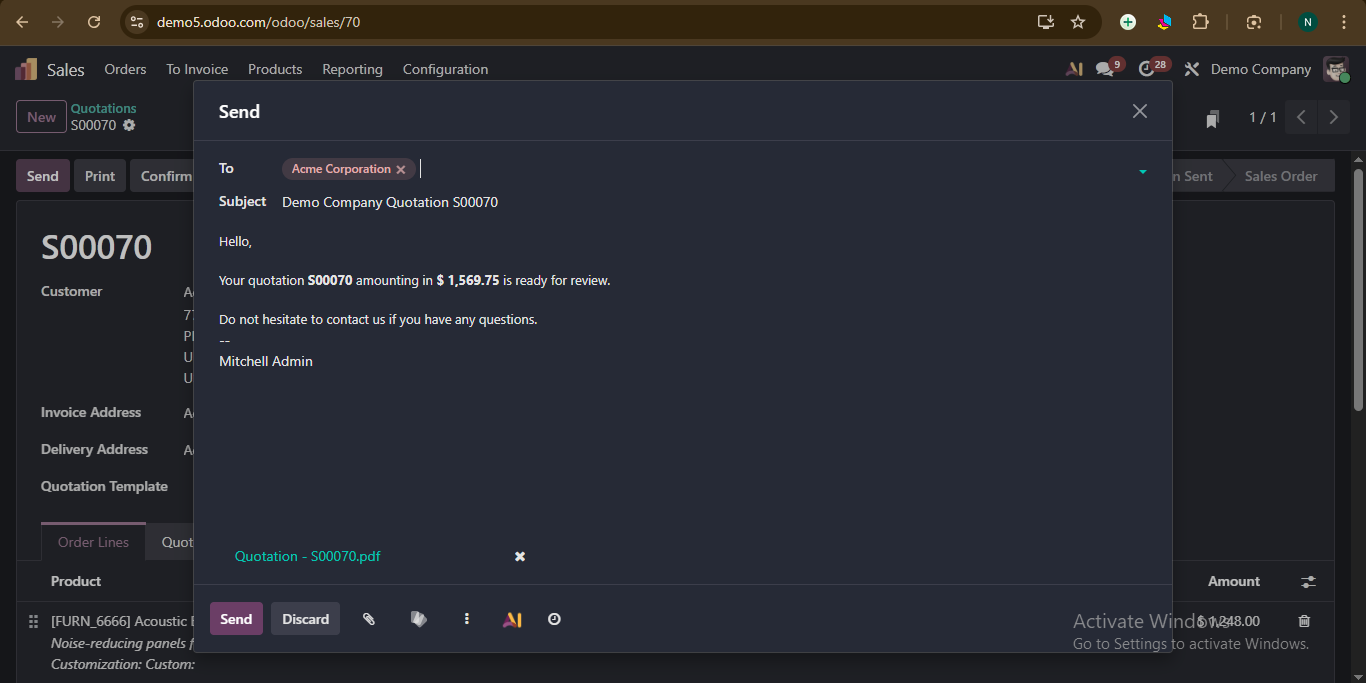
A window pops up, where we can configure our document layout, and when we click ‘continue’ at the bottom of that window. It will redirect to a window that has the customer's name and email address in the Recipients field and a short default message in the body of the email that can be changed if necessary.
A PDF copy of the quotation is included below. When the quotation is ready, click the Send option to the customer for evaluation and confirmation.
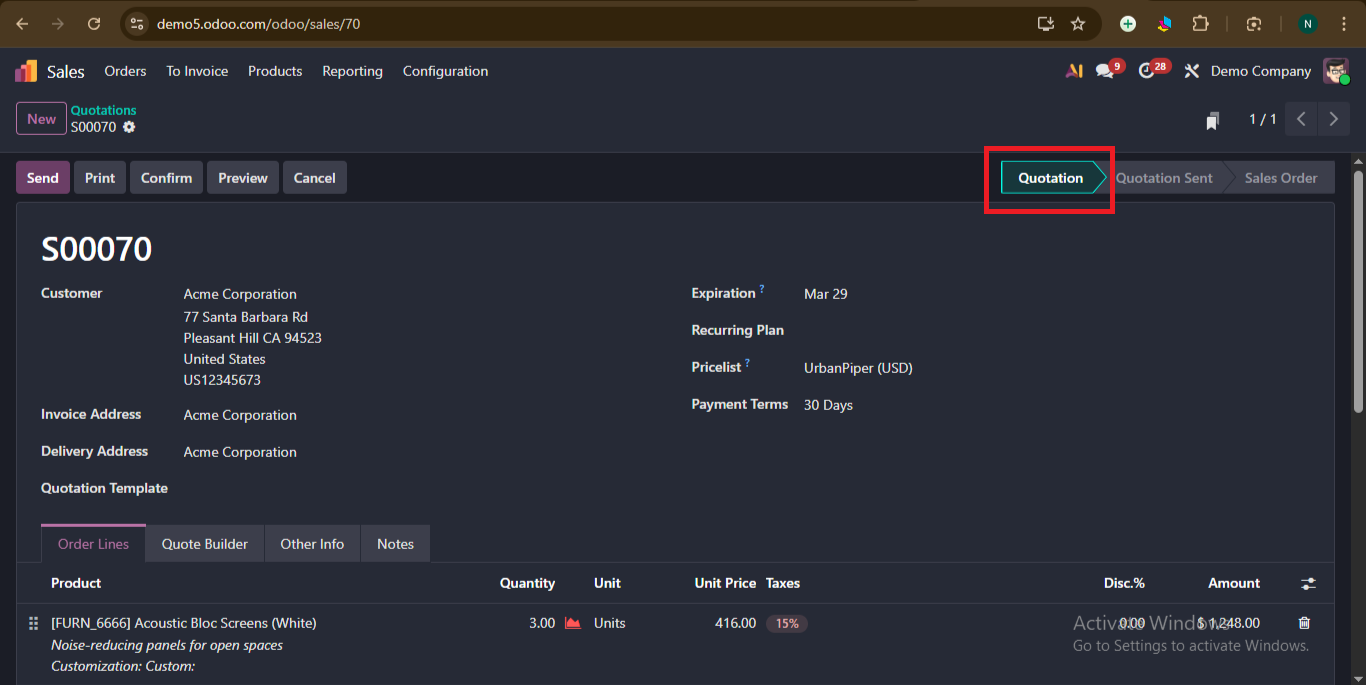
Now before sending this is how the status of quotation looks:
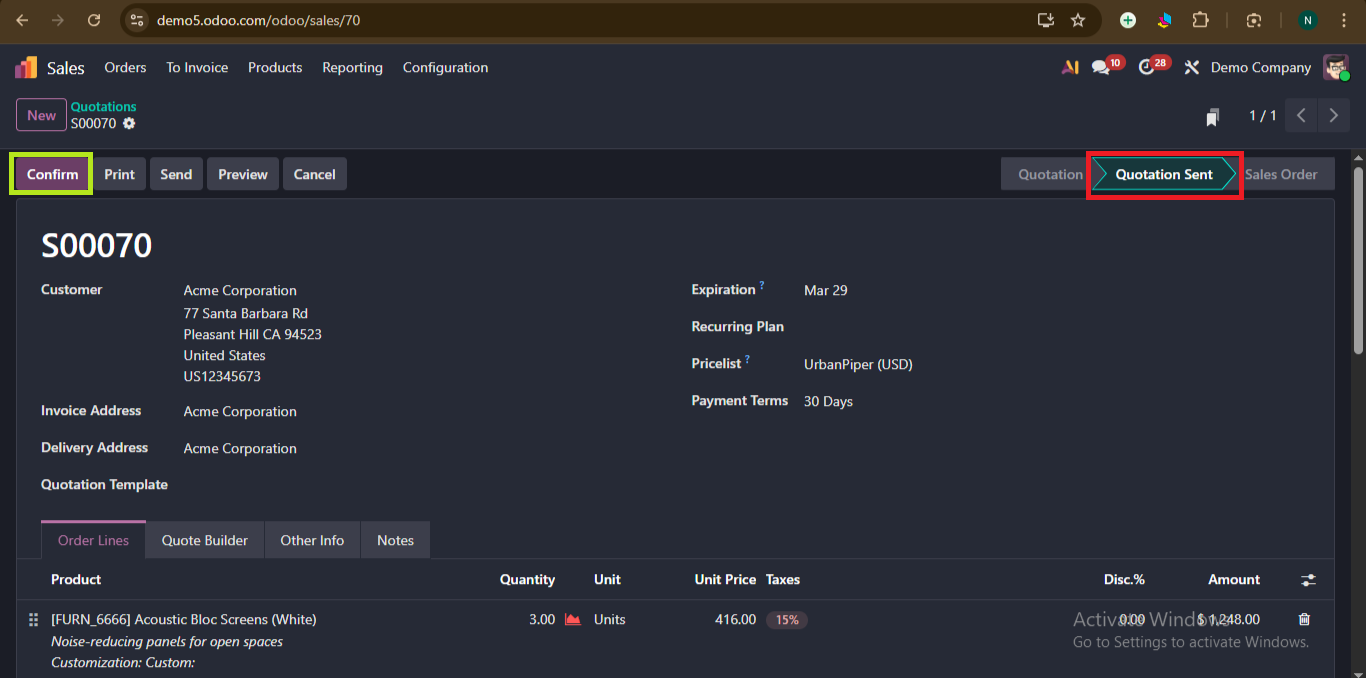
When you click send from the pop-up window, the status changes to ‘Quotation sent’.
That means the quotation information is attached to the email, and it has been sent to the customer.
Now the customer will get a quotation where they can either sign & pay (if we configured ‘Online Signature’ & ‘Online Payment’ from ‘Quotation & Orders’ from configuration>setting ), reject, or give feedback.
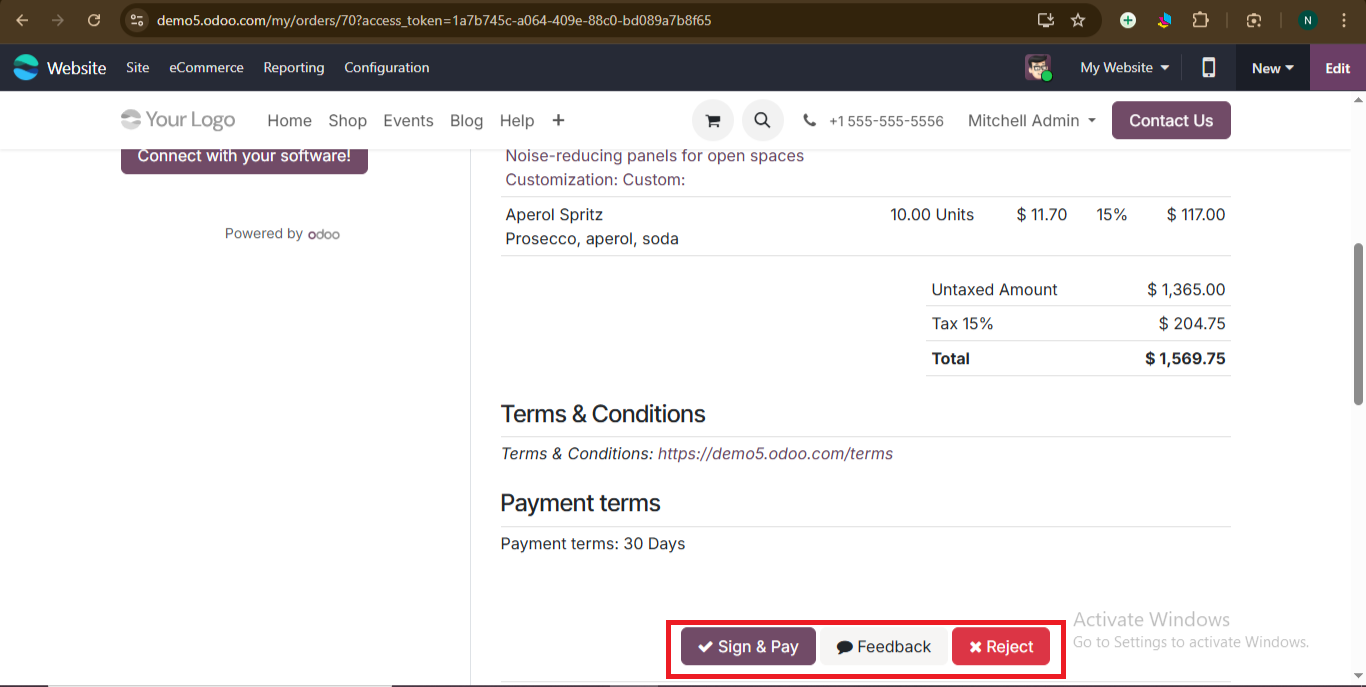
- If the customer has sign & pay digitally that means order is confirmed,so confirm button at left is automatically changed to create invoice and quotation status is changed to ‘Sales Order’
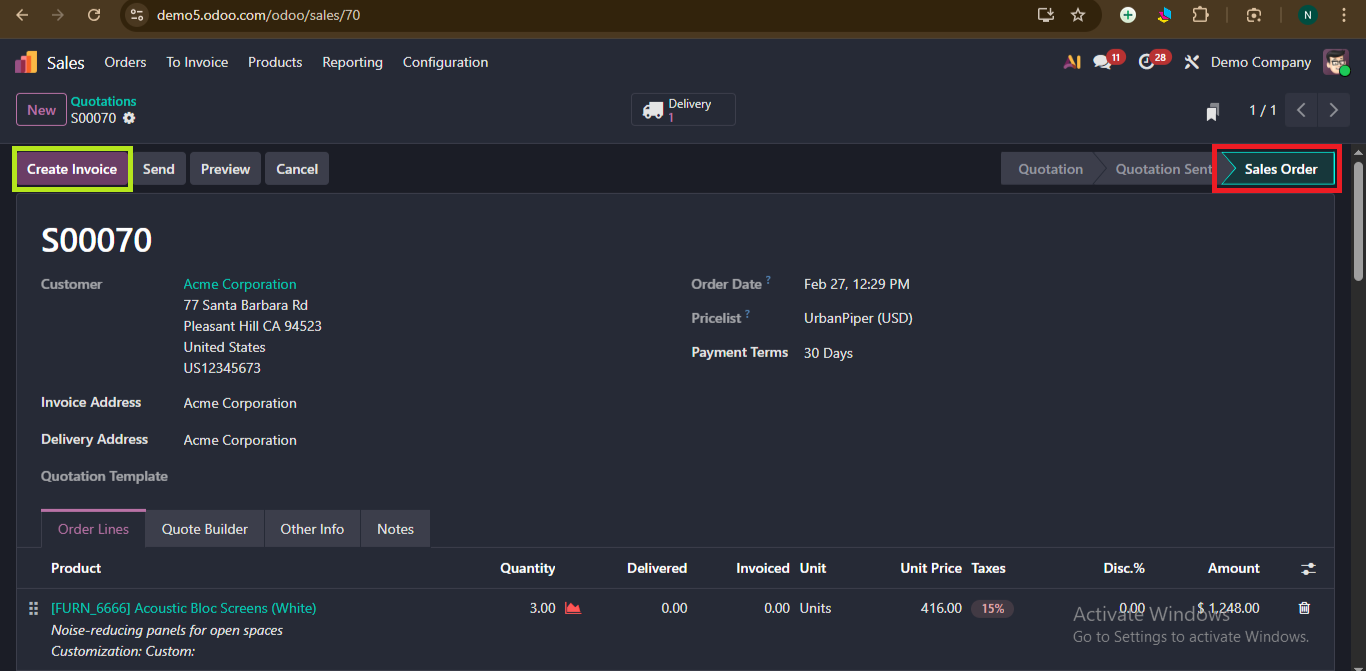
Once the quotation is confirmed, we can generate an invoice by clicking ‘Create Invoice’.An invoice can be done in two ways by going to configuration>settings under invoicing, we can see ‘Invoicing policy’.
1) ‘Invoice what is ordered ’: This method allows the invoice to be created immediately after confirming the Sales Order.
2) ‘Invoice what is delivered’: This method, the invoice can only be created after the delivery is validated.
After validating the invoice and registering the payment, the sales transaction is completed. This completes the full sales workflow in Odoo 19.
Sales Module in Odoo19